


What Are Rear Seat Entertainment Systems and Where To Get Them?
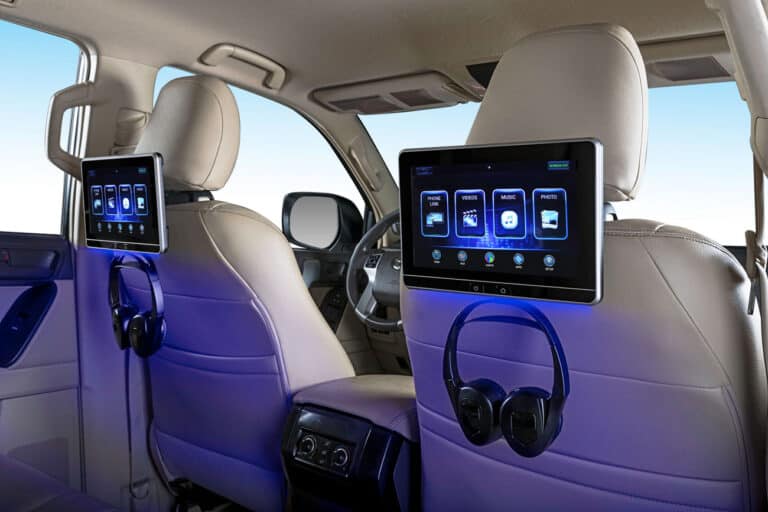
Rear seat entertainment systems are innovatively designed to enhance the entertainment experience for passengers in a vehicle. Typically located in or on the headrests, rear seat entertainment systems are equipped with a variety of multimedia features such as video playback, gaming capabilities, and robust audio functions, transforming every journey into an enjoyable experience.
If your vehicle doesn’t come with a factory-installed rear seat entertainment system, Santa Clarita Autosound in California is your ideal destination for high-quality aftermarket solutions. Our carefully selected range of entertainment systems is chosen to complement your car’s interior, ensuring aesthetic and functional seamless integration.
Visit us at Santa Clarita Autosound, located at 25845 Railroad Ave. Unit 10, Santa Clarita, CA 91350, open from Monday to Saturday, 9:00 am to 6:00 pm. You can also reach us at 661-286-1100 for more information. Our extensive collection is available nationwide through our online store for those who prefer online shopping. Choose Santa Clarita Autosound for an exceptional rear-seat entertainment experience that elevates every journey.
Your Car Entertainment System Reimagined
As technology advances, modern vehicles have become a hub of interactive and intuitive entertainment systems, featuring options to control climate, audio, and navigation screens.
The vehicle’s compatibility with iOS and Android devices is particularly impressive, enabling a level of customization that significantly enhances user experience.
The interactivity offered by these systems ensures a seamless connection with mobile devices, ushering in a new era of in-vehicle entertainment.
Innovative Design: A Game-Changer in Rear Entertainment Systems
Automobile manufacturers invest heavily in updating rear entertainment systems rather than battling unnecessary lawsuits.
The outcome is a powerful, user-oriented system that is sure to impress. Equipped with two 12.6-inch touchscreens nestled between the front-row headrests, the system guarantees enjoyable content viewing for rear passengers.
In a spectacular feat of integration, the system also links with the vehicle’s navigation, offering rear passengers the ability to communicate with the infotainment screen up front. The system’s control can be projected onto the video screen at the front, enabling the sharing of various programs and materials to rear-seat windows.
Tailoring to Your Needs: Customizing Entertainment Options
Depending on your vehicle’s version, multiple configurations are available, including a folding monitor mounted on the roof, improved head restraints, or even replacing the installed front seats.
You can consult your local dealer or a mobile tuner to explore the entertainment options suitable for your vehicle’s back seat. For parents who want their children to control what they watch and hear, the system provides a separate audio program and headphones, letting the kids enjoy while the parents can relish their music.
Unprecedented Versatility: Adapting to Changing Requirements
The range of screen sizes accommodates your vehicle’s specific needs. Screens can be integrated into the rear or front headrests using innovative Screaming Technology and linked to a video recorder installed at the vehicle’s rear. A highlight of this versatile media system is the two class-leading 12.6-inch LCD touchscreens mounted on the front seats’ back.
While these screens might not be visible to passengers in the third row, they can be tilted for improved visibility. The dual high-resolution 10.0-inch touchscreens at the back, installed in 1920, allow rear passengers to indulge in their favorite films.
Endless Entertainment: Detachable Screens and More
The 10.0-inch touchscreens are removable, allowing the entertainment to be carried beyond the vehicle and into the home. The dual-headrest entertainment system in the rear permits passengers to stream games from mobile devices or watch live TV on a spin box. Depending on the package chosen, the entertainment system might include a 9.0-inch Blu-ray and DVD player at the rear.
This backseat entertainment option is a godsend for those weary of children fighting over portable DVD players and tablets during long trips. It ensures every passenger at the rear has their screen, making journeying more peaceful and fun.
Aftermarket Solutions: Upgrading Your In-Car Entertainment
When considering aftermarket rear-seat entertainment systems, you should take into account the number of screens required for your vehicle. A cost-effective option could be to use an existing iPad or Android tablet attached to the seat backrest.
Alternatively, the screens of a current car could be used to build a bespoke rear seat entertainment system, with the option of removable screens for added flexibility.
User-Friendly Features: Ensuring an Immersive Experience
Every system comes with a pair of wireless headphones and a remote control. With the positioning of two 2-watt speakers towards the back, sound can reach the rear passengers without disturbing the front.
This allows easy, hands-free viewing when children are sharing the screen. A USB port is available for charging streaming sticks like the Amazon Fire TV Stick or Roku Streaming Stick. While the system design doesn’t support Bluetooth, a cost-effective Bluetooth adapter can enable headphone connectivity.
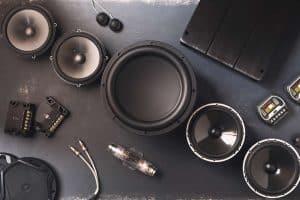
Understanding the Components of a Car Rear Entertainment System
Before diving into the installation process, it’s important to understand the components of a typical car’s rear entertainment system. These include:
- Display screens: Usually installed on the headrest or roof of the vehicle, offering passengers a clear view.
- DVD player or multimedia device: Acts as a source of entertainment, playing DVDs, streaming videos, or connecting to gaming consoles.
- Headphones: For personalized audio, minimizing disturbances to the driver.
- Remote Control: Provides easy control over the system’s operations.
Choosing the Right Rear Entertainment System
When it comes to choosing a rear entertainment system, several factors should be considered:
- Screen Size and Resolution: Larger screens and higher resolution provide a better viewing experience.
- Installation Type: Choose headrest, flip-down, or in-dash systems based on your vehicle and personal preference.
- Connectivity: Ensure it supports HDMI, USB, and Bluetooth for various entertainment options.
- Durability: Look for robustly built systems that can withstand road vibrations and regular usage.
What are the different features available in seat-back entertainment systems?
Seat-back entertainment systems in vehicles have evolved significantly, incorporating a range of features to enhance passenger experience. These systems are designed not only to play media but also to offer interactive and customizable options. Key features include:
- High-Resolution Screens: Modern systems boast high-definition displays for crystal-clear viewing. Some even offer touch screen functionality for ease of use.
- Multi-Source Media Playback: In addition to playing DVDs and Blu-rays, these systems can connect to external devices such as USB drives, smartphones, and tablets, enabling playback of various media formats.
- Streaming Services: With built-in Wi-Fi capabilities, many systems allow passengers to stream content directly from popular platforms like Netflix, Hulu, or YouTube.
- Interactive Gaming: Some systems include built-in games, which can be played using the touch screen or external controllers, offering entertainment beyond just watching videos.
- Audio Features: Quality audio is a key component, with systems often including wireless headphones, multiple speaker options, and the ability to play different audio in different zones of the vehicle.
- Parental Controls: For families, parental control settings enable restriction of content based on ratings, ensuring appropriate viewing for younger passengers.
- Navigation and Vehicle Information: Advanced systems integrate with the vehicle’s navigation and information systems, allowing passengers to view maps or trip details.
- Personalization: User profiles can be created to remember favorite settings, playlists, and viewing history, providing a tailored experience for frequent passengers.
- Language and Accessibility Options: These systems often support multiple languages and may include accessibility features like closed captioning and audio descriptions.
- Internet and Connectivity: Beyond Wi-Fi, some systems offer 4G LTE connectivity, allowing for constant internet access and the ability to use mobile apps directly on the screen.
What specific media playback options are available in seat-back entertainment systems?
Seat-back entertainment systems offer a variety of media playback options. These include DVD or Bluray players, playing movies from connected hard drives, laptops, or mobile devices, and the option of streaming media from platforms like YouTube and Netflix. These options provide flexibility and cater to different preferences and needs.
How can seat-back entertainment systems cater to individuals who do not own DVDs?
For individuals who do not own DVDs, seat-back entertainment systems that can play movies from connected hard drives, laptops, or mobile devices may be more suitable. These systems provide the flexibility to watch movies from different sources, accommodating those who don’t have a collection of physical media.
What are the advantages of physical media playback in seat-back entertainment systems?
Physical media playback, such as DVDs, offers the advantage of being reliable and working wherever you are, regardless of the quality of the Internet connection. With a DVD or Bluray player in the seat-back entertainment system, you can always count on having something to watch.
How can offline viewing be ensured in seat-back entertainment systems?
Seat-back entertainment systems often have apps that allow you to download videos for offline viewing. This means that even if your Wi-Fi signal goes out, there will still be something for you and your kids to watch on the rear seat entertainment system.
What are the different types of media playback options available in seat-back entertainment systems?
Seat-back entertainment systems offer various media playback options. Many systems include a DVD or Bluray player, allowing you to watch physical media regardless of the Internet connection quality. Additionally, some systems can play movies from a connected hard drive, laptop, or mobile device, providing flexibility for those who don’t own DVDs. Streaming media is also an option, where you can view YouTube and Netflix content directly on the entertainment system as long as there is an Internet connection.
What factors should be considered when choosing the size of screens for a rear seat entertainment system?
When it comes to choosing a rear entertainment system, several factors should be considered. One crucial aspect is the screen size and resolution. Larger screens and higher resolution provide a better viewing experience. However, it’s important to note that the size of the screens should be selected based on individual preferences and the dimensions of the vehicle’s headrests.
In addition to screen size, it’s also worth considering the different installation styles available. Some seat-back systems fit snugly into headrests, providing a flush, compact, and clean look. Alternatively, entertainment systems connect via a bracket, offering the advantage of easy removal and portability. Another option to explore is a roof-mounted LED-backlit monitor. Selecting the right installation style depends on factors such as the vehicle’s make, model, and size.
When determining the appropriate screen size, it’s generally recommended to opt for the largest screens that comfortably fit into the headrests of the vehicle. While seven-inch screens work well in most vehicles, 10.1-inch screens can enhance the overall entertainment experience. However, it’s crucial to ensure that the chosen screen size doesn’t compromise the comfort and functionality of the rear seats.
By considering both screen size and installation style, you can make an informed decision when selecting a rear-seat entertainment system. Keep in mind the importance of compatibility with your vehicle and the desire to create an enjoyable and immersive entertainment environment for passengers.
Step-by-Step Guide to Install a Car Rear Entertainment System
This section provides a detailed process for installing a car’s rear entertainment system.
Step 1: Plan Your Setup
First, plan your installation. Identify where to place the screens and DVD player and how to route the cables. Depending on your car model, this can vary greatly.
Step 2: Prepare Your Tools
Ensure you have the necessary tools. These include a screwdriver, wire cutters, electrical tape, and any specific tools mentioned in your system’s installation guide.
Step 3: Remove the Headrest
Start by removing the headrest where you want to install the screen. Be gentle to avoid damaging the seats.
Step 4: Install the Screens
Place the screens in the position you’ve decided. You’ll need to insert the screens into the headrest if it’s a headrest system. For flip-down systems, you’ll mount it on the roof.
Step 5: Route the Cables
Route the cables from the screens to the source device. To keep them hidden, you’ll need to tuck them into the car’s upholstery neatly.
Step 6: Connect the System
Connect the system to the power source, ensuring all the cables are securely connected. Connect the system to the source device, too.
Step 7: Test the Rear Entertainment System
Turn on the car and test the system. Make sure the sound, video, and controls are all functioning correctly.
Keeping Your System in Top Condition
Once installed, it’s important to maintain your rear entertainment system. Keep the screens clean, handle the remote control carefully, and avoid overloading the system.
Quality Service: Trusting Santa Clarita Autosound
Should you wish to retain your current headrest but require a permanent installation, consider the Overhead 10.4″ DVD Player. It features a 10.4-inch monitor that can sync and play the same DVD or multiple DVDs simultaneously, along with two pairs of headphones and remote mounts.
To make the most of these advanced systems, consider Santa Clarita Autosound. Our experts can help identify the right system for your needs. We offer quality and branded products and professional installation services to ensure your investment is well-protected.
Santa Clarita Autosound is equipped to install any video system in the car they sell, guiding you to the system best suited for your ride. An in-car mobile DVD player can make all the difference on long trips or when children need to spend time in the car. The proper professional installation can save you considerable time and hassle, guaranteeing an improved in-car experience.