


Want to upgrade your car’s sound system and wonder how to install a subwoofer in your car? Installing a subwoofer in your car might make you feel intimidated at first. And for a good reason. It’s a common mistake to think that it’s easy to do, only to end up with your subwoofer not working.
But, with the right instructions and careful planning, installing a subwoofer can be a task you can do. Here’s a quick overview of the process and what awaits you:
You’ll need to choose the right subwoofer for you. For that, it’s important to understand the right subwoofer specifications. There are size and power requirements that will help you determine which is the best one to choose.
You’ll also need to prepare all the tools and supplies before you begin the installation. You’ll need to prepare your car before you get started. Wiring and mounting are also key elements in this process.
After this, you will need to connect, test, and adjust to finally get it right. In case you run into any trouble, we have a couple of tips to help you out. We will also guide you in seeking expert help when needed.
This step-by-step guide will lead you like a professional through the process. Be sure to carefully follow these steps to get the best and most deep sounds from your subwoofer installation. Let’s get right into it!
Step 1: Choosing the Right Subwoofer
Firstly, you’ll need to look for the right subwoofer. The right subwoofer is the backbone of your car’s sound quality. You need to find the best combination of your music likes, car interior features, and your budget. Let’s get into the details of how to choose the most suitable subwoofer for your car. You’ll need to understand the specifications of a subwoofer to choose the best one.
Understanding Subwoofer Specifications
During your search, you will come across many specifications. It’s all about power, sensitivity and frequency range. Let’s take a look at what they mean.
First, the power rating, which is measured in watts, should be checked. The RMS power rating is the benchmark to determine its power handling capability.
The next parameter to focus on is the subwoofer’s sensitivity. It is expressed in decibels (dB). The higher the sensitivity, the more efficient the power consumption. This is for achieving sound volume. Impedance expressed in ohms is related to electrical resistance. Most car subwoofers are 2 or 4 ohms.
Lastly, if you want a full and deep bass, focus on the frequency range. Remember, the lower it goes, the deeper the bass you will feel. Once you have these specifications, think about the size and the power requirements.
Determining the Size and Power Requirements
Selecting the size of your subwoofer is a combination of the sound you want, the space availability, and power needs. Standard sizes go from 8 inches to 15 inches. Subwoofers in bigger size produce deeper bass, but they consume more power and space.
Think about the space your car has and whether the amp you install will be strong enough. Keep in mind that a more powerful subwoofer needs additional space. Also, it needs a higher power supply to use its full potential.
After you make a decision, you will need to prepare for the process.
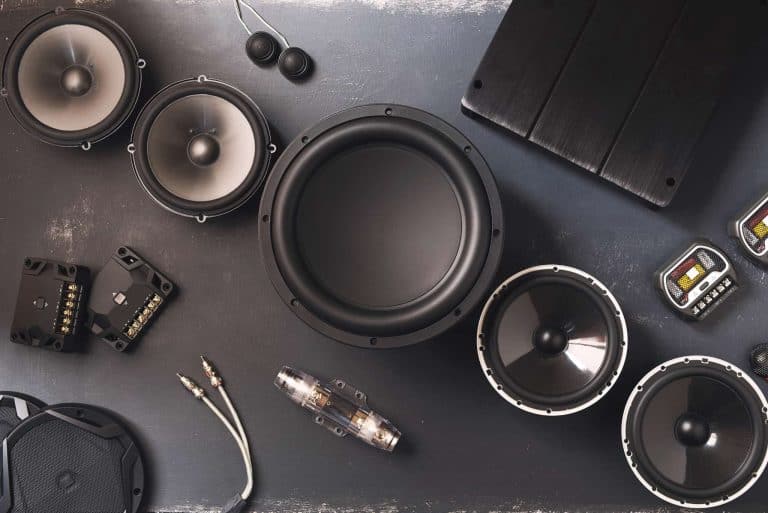
Gathering the Necessary Tools and Supplies
Make sure your tools and supplies are ready before you start the installation. This will make your work easier and the process smoother.
Here’s a basic list to get you started:
- A compatible subwoofer and enclosure
- Wires and power cables
- A screwdriver set
- Wire strippers and crimpers
- Electrical tape or heat shrink tubing
- Soldering iron and solder
- A drill, if you need to secure the subwoofer or run cables through tight spots
These tools and materials should be prepared in advance. Your installation process will go smoothly and without any delays. If you are prepared, your experience will be more enjoyable and transparent.
Step 2: Preparing Your Car
Once you have the tools and materials ready, don’t jump into the installation process yet. You need to be prepared to ensure the success of the procedures. This stage of preparation is key to avoid any problems and to make the installation as easy as possible.
Disconnect the Battery
First things first, safety is crucial. You need to start by disconnecting the negative terminal of your car’s battery. This is an important stage. Eliminate any electrical shorts or shocks during the process of your subwoofer wiring. All you need is a wrench to release the nut and remove the terminal. It’s a small step but a big one in the matter of your safety.
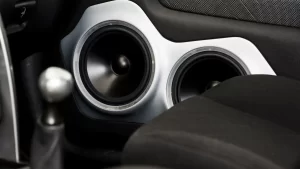
Finding the Ideal Spot for Your Subwoofer
Next, you will need to determine where you will put your subwoofer. The most frequent locations include the trunk, under a seat, behind the seat, or in the rear area for the SUV drivers.
Think of your subwoofer size, possible space, and the location. These are things that might influence the sound quality. Recall that the purpose is to achieve better perception of sound. So, consider how sound waves behave in your car.
Measuring and Planning the Installation
After choosing the perfect spot, measure the area to make sure your subwoofer will fit. Then, plan how you will route the wires from the battery, radio, and amplifier to the subwoofer.
This is a good time to also make a list of any additional tools or materials you might need.
Step 3: Installing Subwoofer in Your Car
Now it’s time to install the subwoofer in your car. This is one of the most important parts, so make sure you read it carefully.
Wiring Your Subwoofer
Now, your car is prepped and you have noted what else you might need. That means it’s time to start wiring your subwoofer. This part might seem tricky, but with a little patience, you can do it like a pro.
Running Power and Ground Wires
To start, run a power wire from the positive terminal of your battery to where the subwoofer will be located. Ensure that the wire is routed away from moving parts. As well as, potentially hot areas to prevent any damage. It is good to find somewhere near a bolt or metal part of the car’s frame. Attach the wire and make sure the connection is good. This is an important stage in signal quality improvement for your audio system.
Connecting the Remote Turn-On Wire
Next, you will need to connect the remote turn-on wire. This wire tells your subwoofer (or amplifier) to power on when your car stereo does. Typically, this wire connects to the back of your car stereo. It is a smaller wire, so be gentle. Make sure it’s securely connected.
Routing Audio Cables
Lastly, connect the audio wires from your car sound system to the subwoofer. Do not run these cables along with power wires to prevent interference. When at the sub, connect the cables as instructed in the manual. This is simple in most cases. Still, they can differ. Therefore, it’s necessary to verify them.
Step 4: Mounting Your Subwoofer
Now it’s time to think about enclosing and securing your subwoofer. Firstly you’ll need to choose the right enclosure for your subwoofer, whether pre-built or custom-made. And then follow by firmly securing it within your car.
Building or Buying an Enclosure
To achieve good sound, you need to properly install the subwoofer. For that, your first step is to either purchase one or build an enclosure. If you are handy and have unique sound requirements, you can create your own enclosure. This will enable customization possibilities.
However, purchasing a pre-made enclosure is a time-saver. It also grants a guaranteed professional fit. Ensure the enclosure matches your subwoofer’s specs in order to secure the right fit.
Securing the Subwoofer
Now that you have your enclosure, the next step is to put the subwoofer in your vehicle. The trunk is the most popular area for a car due to plenty of space. For trucks, it usually goes under or in back of the seats because of space limitations.
As you are installing, consider how it will affect your space and its safety from heavy items. This is because they may cause damage. Attach the enclosure to the vehicle using braces or straps. That will avoid movement that can lead to either damage or poor sound quality from vibrations.
Step 5: Connecting the Subwoofer to the Car Stereo
The final step is to connect your car stereo with the subwoofer and fine-tune the sound. Below is a detailed overview of what exactly you’ll need to do and how.
Using a Line Output Converter
If your car stereo does not have a dedicated subwoofer output, then the line output converter will be the best choice for you. This gadget converts stereo outputs to RCA outputs that can connect to an amplifier. It is easy to do with no need to replace the whole stereo system.
Another output to consider would be a DSP (Digital signal processor) such as Kicker KEYLOC, AudioControl LC2i, or LC2iPro.
Utilizing High-Level Inputs
Some subwoofer amplifiers have high-level inputs that can be directly connected to the speaker outputs of a stereo.
This option is less clean than using the line output converter. However, it’s simple and efficient to add a subwoofer to your current system easily.
Wiring the Subwoofer to an Amplifier
Finally, you need to connect your subwoofer correctly to the amplifier if you want that desired high level sound. Ensure that you have an amplifier power rating that will not damage the subwoofer. Connect the RCA cables from the stereo or converter to the amplifier. Then, connect the speaker wires from the amplifier to the subwoofer.
Lastly, recheck all the connections and make sure they are closed and mated correctly. Now enjoy the lively and deep bass your car audio system can now produce.
Testing and Adjusting the Subwoofer
The next steps you will need to do after installing the subwoofer are testing and adjusting. This is done to achieve optimal performance.
Reconnecting the Negative Battery Terminal
Before the final test of the new car audio component, connect the negative battery terminal that you removed at the beginning of the installation process. This restores the supply of power to the car’s electrical system. Be careful and make sure that everything is well connected and secured.
Adjusting the Subwoofer Settings
After the power is restored, it’s time to adjust your subwoofer’s settings. First, begin by setting your subwoofer’s volume and crossover. Phase controls to their low positions. This point will be our baseline. After that, set each effect depending on the music you play and your listening preferences.
Sound Testing and Fine-Tuning
Now, for the fun part—testing the sound. Select a set of songs of different genres to test the overall sound quality. Watch for the expression of clarity, depth, and balance. Adjust the settings of the amplifier until you find the perfect sound. However, the fine-tuning is a personal preference. Thus, you need some time to get the perfect setting.
Troubleshooting Common Issues
Even with careful installation, you can still run into some problems. Here are the steps to guide you to solve the common issues.
No Sound or Weak Bass
When there is no sound or weak bass, the first thing you should do is check your connections. Double-check that the subwoofer is plugged correctly to the amplifier and the head unit. In addition, ensure that the amplifier is powered.
Distorted Sound or Rattling Noise
If sound is distorted or something sounds like loose components that need to be tightened or settings need to be adjusted. Tighten up any loose screws and make sure the subwoofer is firmly mounted. On top of that, adjust the gain and low-pass filter on your amplifier for a cleaner sound.
Overheating Subwoofer or Amplifier
A malfunctioning subwoofer or amplifier may result from two reasons. Either it’s inadequate ventilation or too much power load. Make sure there is enough space around your devices to ensure proper airflow. Additionally, make sure that your amp’s impedance rating is equivalent to your sub’s rating to avoid overloading.
Doing these steps and tips will definitely help to improve the sound quality of your car. It is important to be patient and make necessary adjustments. This is key in order to realize the best possible performance of your newly purchased subwoofer.
Bonus Tip: When to Seek Professional Help for Subwoofer Installation
While a subwoofer installation may look like a fun DIY project, there are some situations where it’s wise to seek professional help.
Electrical expertise: Maybe you are not confident in working with your car’s electrical system. Or maybe you are not sure about proper grounding techniques. In that case, it’s best to trust a professional. An expert can take care of your subwoofer installation in a safe manner.
- Complex or custom setups
Often, high-quality car audio setups involve a range of components. These include multiple subwoofers, an amplifier, custom enclosures and more. Professional installation can help ensure there are no wiring issues. And, that all components are integrated and optimized for the best performance. - Advanced tuning
Balancing and adjusting the sound is an art. It requires certain skills and knowledge. For the best experience, rely on professionals. Their expertise as well as their tools will fine-tune the system. - Unique car model
Some car models may have particular difficulties and demand custom solutions for subwoofer placement on their cars. A professional subwoofer installation services have experience with different cars. They can help you to find the best place and mount it as securely as possible. - Saving time and resources
If you want to have peace of mind, save your time and resources. It is best to let experts handle subwoofer installation for your car. Just be careful to select trully professional installation services. Make sure they get the job done right and help you avoid potential issues down the road.
Get Professional Subwoofer Installation Services in Santa Clarita
If you’re located in the Santa Clarita area and need assistance with subwoofer placement or any other car audio needs, look no further than Santa Clarita Auto Sound. Our team of experienced professionals are passionate about creating exceptional audio experiences for every driver.
What we offer:
- A wide selection of top-quality subwoofers to fit your budget and preferences. With nationwide delivery!
- Experienced technicians who are skilled in all aspects of subwoofer installation and car audio systems customization.
- Best pricing and financing options for you to get the best value for your budget.
Get directions to visit us or call us at (661) 286-1100 to discuss your subwoofer installation needs.
Final Thoughts on Installing a Subwoofer in Your Car
Subwoofer not only upgrades your car sound system to a whole new level, but it also increases the value of your car. Keep in mind that the secret of a problem-free installation consists of planning, patience, and accuracy.
With this guide, now you know what it takes to install a subwoofer in your car. You know how to choose the right subwoofer, wire, mount and secure it. After which, you can connect it to your car stereo, fine tune and enjoy the new bass sound.
So if you’ve followed these steps, congratulations! You’ve successfully installed the car subwoofer like a professional. Now, lean back, turn on your own favorite tracks, and immerse yourself in the deep waves of the subwoofer.